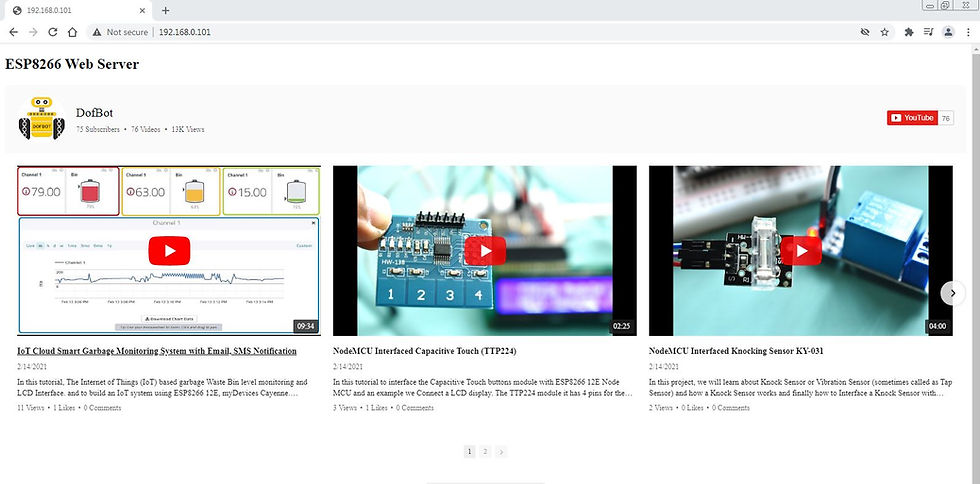
In this tutorial , I 'll Publish how to set up a you tube channel videos in web sever using ESP8266 12E. In this tutorial we are making ESP8266 Async Web server with HTML web page. ESP8266 connects to WiFi Network and we get web page in our phone and PC which is connected to same WiFi network.

Refer Previous tutorial about elfsight widgets.
Subscribe and Download code.
ESP8266 Asynchronous Web Server
To build the web server we’ll use the ESPAsyncWebServer library that provides an easy way to build an asynchronous web server. Building an asynchronous web server has several advantages. We recommend taking a quick look at the library documentation on its GitHub page.

Installing the ESPAsyncWebServer library
The ESPAsyncWebServer library is not available to install in the Arduino IDE Library Manager. So, you need to install it manually.
Click here to download the https://github.com/me-no-dev/ESPAsyncWebServer/archive/master.zip
library. You should have a .zip folder in your Downloads folder Unzip the .zip folder and you should get ESPAsyncWebServer-master folder
Rename your folder from ESPAsyncWebServer-master to ESPAsyncWebServer
Move the ESPAsyncWebServer folder to your Arduino IDE installation libraries folder
Installing the ESPAsync TCP Library
The ESPAsyncWebServer library requires the ESPAsyncTCP library to work. Follow the next steps to install that library:
Click here to download the https://github.com/me-no-dev/ESPAsyncTCP/archive/master.zip
library. You should have a .zip folder in your Downloads folder
Unzip the .zip folder and you should get ESPAsyncTCP-master folder
Rename your folder from ESPAsyncTCP-master to ESPAsyncTCP
Move the ESPAsyncTCP folder to your Arduino IDE installation libraries folder
After installing the libraries, restart your Arduino IDE.
Subscribe and Download code.
Subscribe and Download code.
Arduino code
// Import required libraries
#include <Arduino.h>
#include <ESP8266WiFi.h>
#include <Hash.h>
#include <ESPAsyncTCP.h>
#include <ESPAsyncWebServer.h>
// Replace with your network credentials
const char* ssid = "TP-Link_3200"; // Your WIFI SSID
const char* password = "9500112137"; //Your WIFI Password
// Create AsyncWebServer object on port 80
AsyncWebServer server(80);
// Updates DHT readings every 10 seconds
const long interval = 10000;
const char index_html[] PROGMEM = R"rawliteral(
<!DOCTYPE HTML><html>
</head>
<body>
<h2>ESP8266 Web Server</h2>
<p>
<script src="https://apps.elfsight.com/p/platform.js" defer></script>
<div class="elfsight-app-f52c1400-69f0-4ade-b38f-88cd4831b533"></div>
</P>
<p>
<i class="fab fa-youtube" style="font-size:1.0rem;color:red;"></i>
<span style="font-size:1.0rem;">Subscribe to </span>
<a href="https://www.youtube.com/channel/UCnIld2cZ8iAvoYZlMHWZrtA?sub_confirmation=1" target="_blank" style="font-size:1.0rem;">Dofbot YouTube Channel</a>
</P>
</body>
</script>
</html>)rawliteral";
void setup(){
// Serial port for debugging purposes
Serial.begin(115200);
// Connect to Wi-Fi
WiFi.begin(ssid, password);
Serial.println("Connecting to WiFi");
while (WiFi.status() != WL_CONNECTED) {
delay(1000);
Serial.println(".");
}
// Print ESP8266 Local IP Address
Serial.println(WiFi.localIP());
// Route for root / web page
server.on("/", HTTP_GET, [](AsyncWebServerRequest *request){
request->send_P(200, "text/html", index_html);
});
// Start server
server.begin();
}
void loop(){
unsigned long currentMillis = millis();
}
Now, upload the code to your ESP8266. Make sure you have the right board and COM port selected.

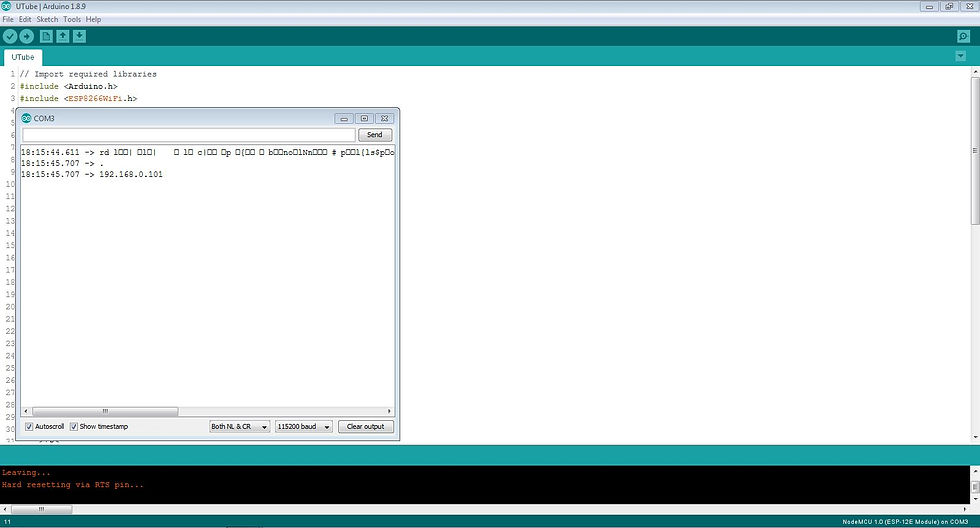
After uploading, open the Serial Monitor at a baud rate of 115200. Press the ESP8266 reset button. The ESP8266 IP address should be printed in the serial monitor and get result in web page.

Comments