Water Level Controller with Real time Data Logger and Bluetooth
- Ramesh G
- Dec 24, 2021
- 5 min read
Updated: Jan 2, 2022
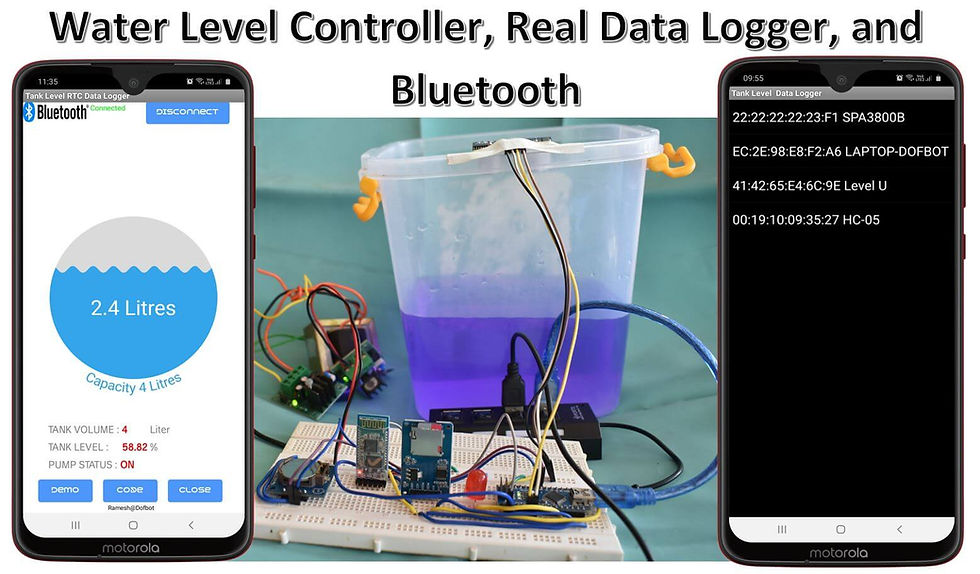
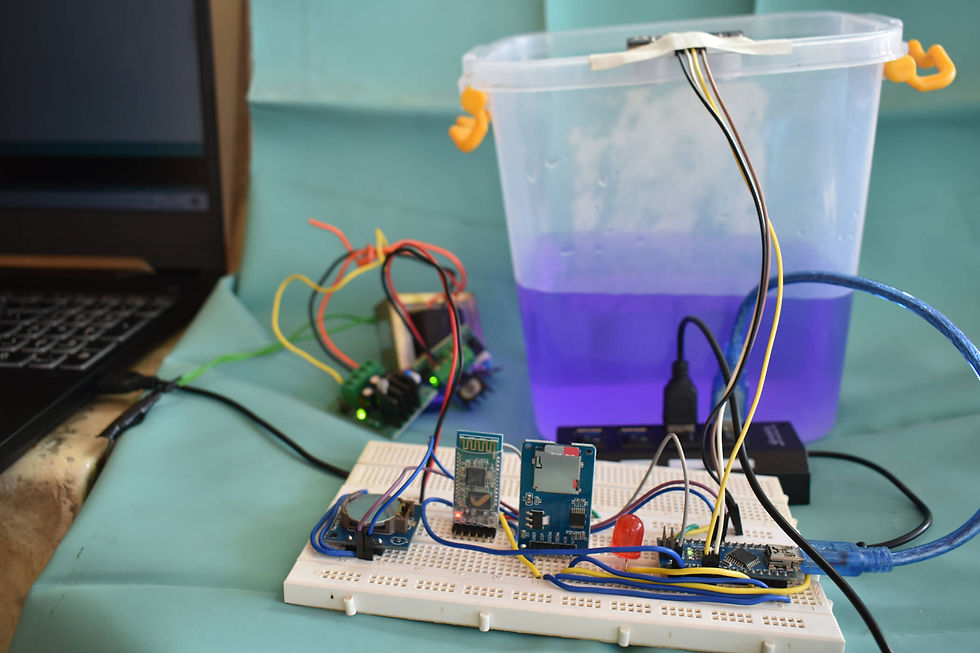
Learn here to create Arduino Based Water Level controller with RTC data logger. We’ll use the HC SR04 ultrasonic to measure tank level, the real time clock (RTC) module to take time stamps and the SD card module to save the water storage in liter, water filled in percentage and Pump motor ON/OFF status on the SD card, and Bluetooth send water level data to android application for HTML Java script Tank Gauge display.
Components required
Arduino Nano - 1 no
Micro SD card Module - 1no
Memory Card 16GB (16GB used in this Project)- 1no
HC SR04 - 1 no
DS1307 RTC I²Cmodule - 1 no
Bluetooth HC-05 - 1 no
Jumper wires
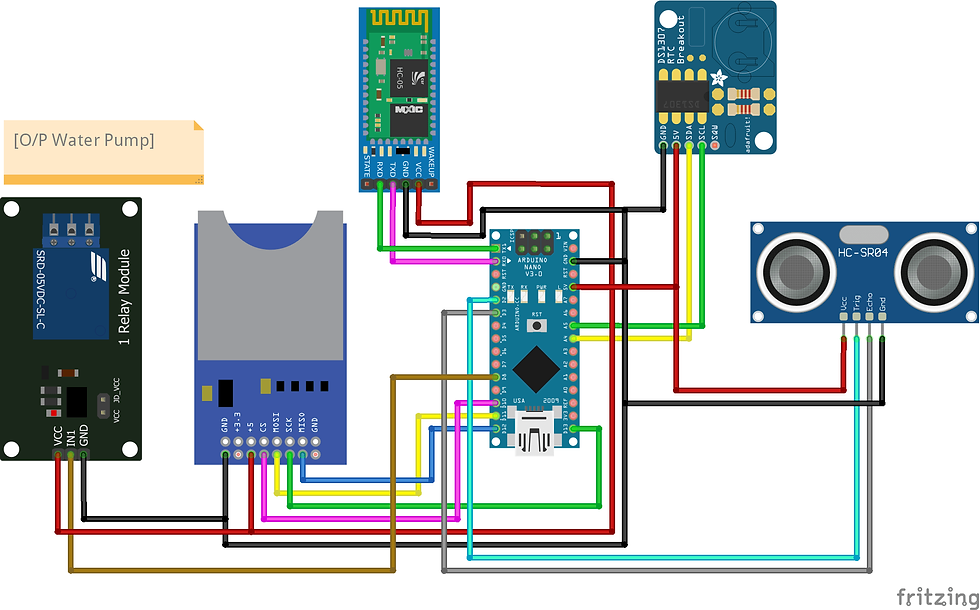
Circuit diagram
HC-SR04
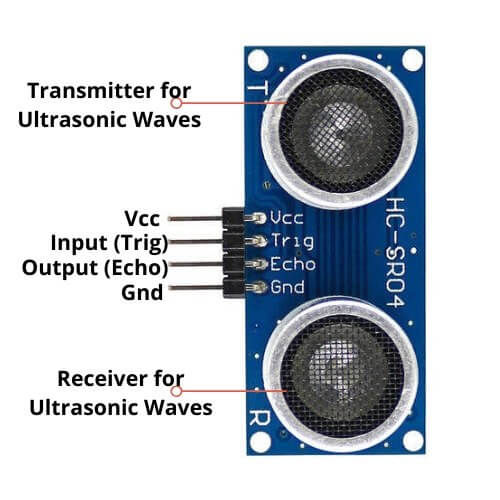
HC-SR04 Ultrasonic sensor is a 4 pin module, whose pin names are Vcc, Trigger, Echo and Ground respectively. This sensor is a very popular sensor used in many applications where measuring distance or sensing objects are required. The module has two eyes like projects in the front which forms the Ultrasonic transmitter and Receiver. The sensor works with the simple high school formula that
Distance = Speed × Time
This economical sensor provides 2cm to 400cm of non-contact measurement functionality with a ranging accuracy that can reach up to 3mm.
VCC (Power) to Arduino Nano 5V
Trig (Trigger) to Arduino Nano D2 Pin
Echo (Receive) to Arduino Nano D3 Pin
GND (Ground) to Arduino Nano GND Pin.
Refer more Data sheet Download
Refer to project Real time Temperature data logger for more detail.
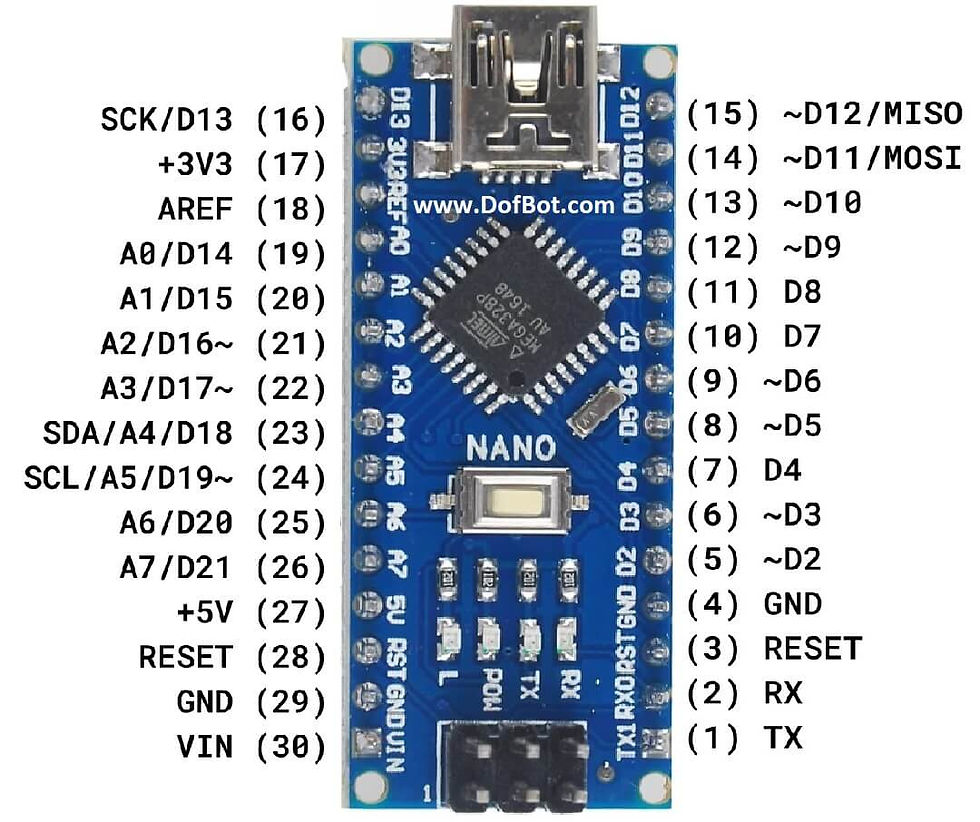
The Arduino Nano board
The Arduino Nano board provides more or less the same functionality of the Arduino Duemilanove but in a more compact design. Comparing to the Arduino Duemilanove board, the Arduino Nano board lack a DC power jack and has a mini-USB connector instead of a standard USB.
Technical specifications of the Arduino Nano board
The technical specifications of the Arduino Nano board are as follows:
Microcontroller ATmega328
Operating Voltage (logic level): 5 V
Input Voltage (recommended): 7-12 V
Input Voltage (limits): 6-20 V
Digital I/O Pins : 14 (of which 6 provide PWM output)
Analog Input Pins: 8
DC Current per I/O Pin: 40 mA
Flash Memory 32 KB (ATmega328) of which 2 KB used by bootloader
SRAM: 2 KB (ATmega328)
EEPROM: 1 KB (ATmega328)
Clock Speed: 16 MHz
Dimensions: 0.73" x 1.70"
Powering the Arduino Nano
The Arduino Nano can be powered via the Mini-B USB connection, 6-20V unregulated external power supply (pin 30), or 5V regulated external power supply (pin 27). The power source is automatically selected to the highest voltage source.
Programming the Arduino Nano board
The Arduino Nano can be programmed using the free Arduino software (download). Select "Arduino Diecimila, Duemilanove, or Nano w/ ATmega168" or "Arduino Duemilanove or Nano w/ ATmega328" from the Tools > Board menu.
The ATmega328 microcontroller on the Arduino Nano board comes preburned with a bootloader that allows you to upload new code to it without the use of an external hardware programmer. You can also bypass the bootloader and program the microcontroller through the ICSP (In-Circuit Serial Programming) header.

Cylinder Volume Calculator
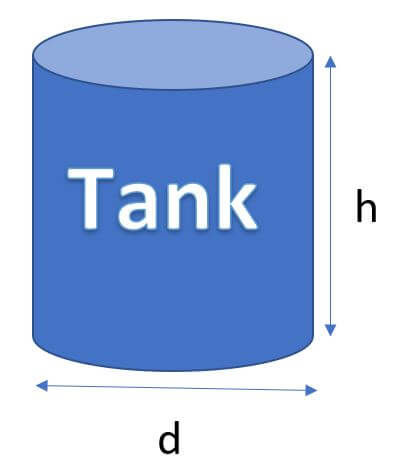
Vertical cylinder shaped tank is the area, A, of the circular end times the height, h.
Volume=A.h
A = πr² where r is the radius which is equal to d/2. d is diameter of Cylinder.
Therefore, Volume = πr²h
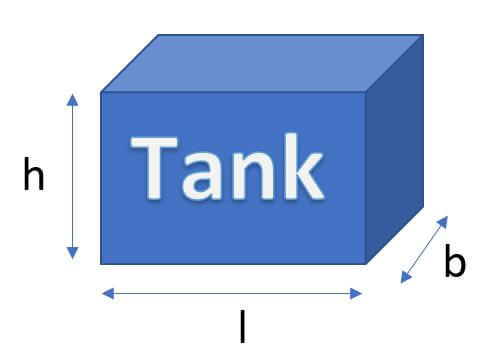
Rectangle shaped tank is length times width times height.
Therefore, Volume = lwh
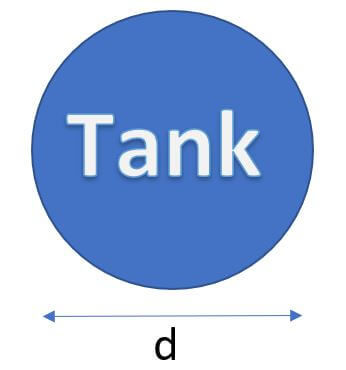
A sphere of diameter d split in half and separated by a cylinder of diameter d
Where r = d/2.
Therefore, Volume = (4/3)πr³
Installing arduino Library
Download Ultrasonic library , we need to use this library.
DS1307: you need to Download and install the RTC library.
Follow the next steps to install those libraries.
In your Arduino IDE, to install the libraries go to Sketch > Include Library > Add .ZIP library… and select the library you’ve just downloaded.
After installing the required libraries, copy the following code to your Arduino IDE.
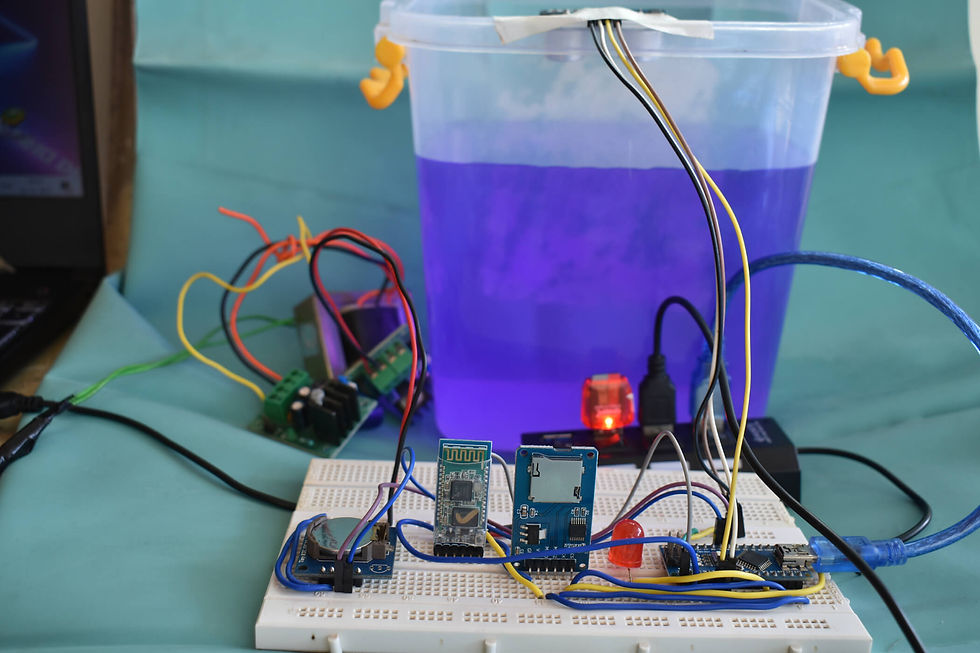
Arduino Code:
// include the SD library:
#include <SPI.h> // Include SPI library (needed for the SD card)
#include <SD.h> // Include SD library
#include <RTClib.h> // for the RTC
#include <Ultrasonic.h>
Ultrasonic ultrasonic(2, 3);
int distance;
int Lowlevel = 20; // Pump ON - Percentage 20% you can change the value as per your need
int Highlevel = 70; // Pump OFF - Percentage 70% you can change the value as per your need
File dataFile;
int TankHeight = 17; // Manually enter Tank height in cm
// Cylinder Tank volume V = πr2h, where h= 30cm, r = 15cm
// Rectancle Tank volume V = lwh, where h= 17cm, w = 14cm, l= 17cm; Volume = 4 .03 liters
int TotalVolume = 4; // mini tank Volume = 4 .03 liters
int Volume;
float Percentage,math;
// Real Time Clock
RTC_DS1307 rtc;
#define MOTORPIN 8 // Pump relay
String Data;
void setup() {
Serial.begin(9600);
pinMode(MOTORPIN,OUTPUT);// Relay pin as output pin
// setup for the RTC
while(!Serial); // for Leonardo/Micro/Zero
if(! rtc.begin()) {
Serial.println("Couldn't find RTC");
while (1);
}
else {
// following line sets the RTC to the date & time this sketch was compiled
rtc.adjust(DateTime(F(__DATE__), F(__TIME__)));
}
if(! rtc.isrunning()) {
Serial.println("RTC is NOT running!");
}
while (!Serial); // wait for serial port to connect. Needed for native USB port only
Serial.print("Initializing SD card...");
if (!SD.begin()) {
Serial.println("initialization failed!");
while (1);
}
Serial.println("initialization done.");
delay(2000);
}
void loop() {
// Wait a few seconds between measurements.
delay(2000);
distance = ultrasonic.read();
math = TankHeight-distance;
Percentage = (math/TankHeight)*100;
// Volume = (TotalVolume/100)*Percentage;
if ((Percentage >= 0) && (Percentage <= 100))
if(Percentage <= Lowlevel) // Relay ON when reached Low Level point
{digitalWrite(MOTORPIN,HIGH);}
if(Percentage >= Highlevel) // Relay OFF when reached High Level point
{digitalWrite(MOTORPIN,LOW);}
dataFile = SD.open("LevelLog.txt", FILE_WRITE);
DateTime now = rtc.now();
if (dataFile) {
// Serial.print("Tank Level: ");
Data = (String)TotalVolume + ":" + (String)Percentage+ ":"+ (String)(digitalRead(MOTORPIN));
Serial.println(Data);
delay(1000);
dataFile.print(now.year(), DEC);
dataFile.print('/');
dataFile.print(now.month(), DEC);
dataFile.print('/');
dataFile.print(now.day(), DEC);
dataFile.print(',');
dataFile.print(now.hour(), DEC);
dataFile.print(':');
dataFile.print(now.minute(), DEC);
dataFile.print(':');
dataFile.print(now.second(), DEC);
dataFile.print(",");
dataFile.print(F("Tank Level: "));
dataFile.print(Percentage);
dataFile.print(F("Pump Status "));
dataFile.print(digitalRead(MOTORPIN));
dataFile.close();
}
// if the file didn't open, print an error:
else
Serial.println("error opening LevelLog.txt");
}
Serial Monitor
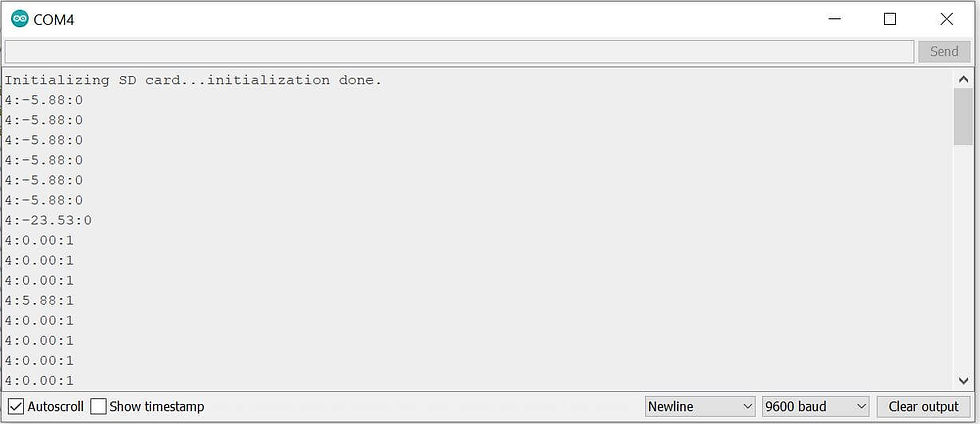
After a successful upload, open the Serial Monitor at a baud rate of 9600. Press the “EN/RST” button on the Arduino Uno board and see the Temerature, Humidity and Heat index vaule in Serial monitor at every 15 second.
SD Card
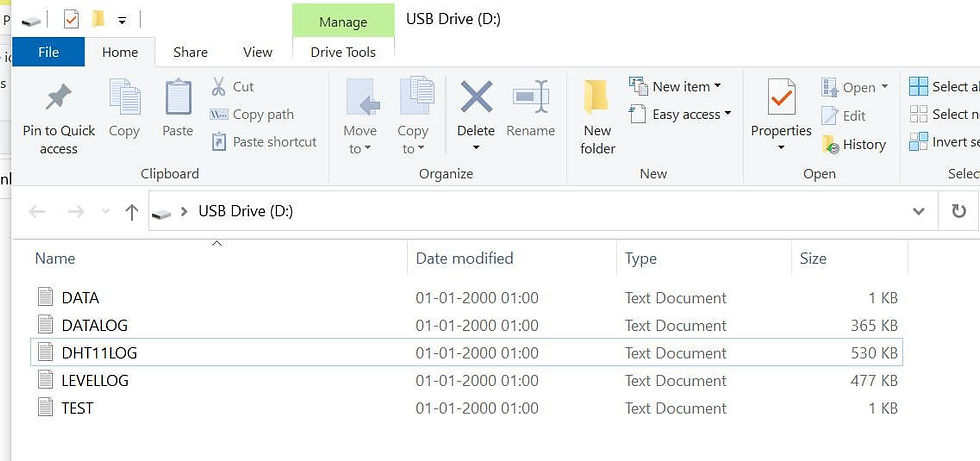
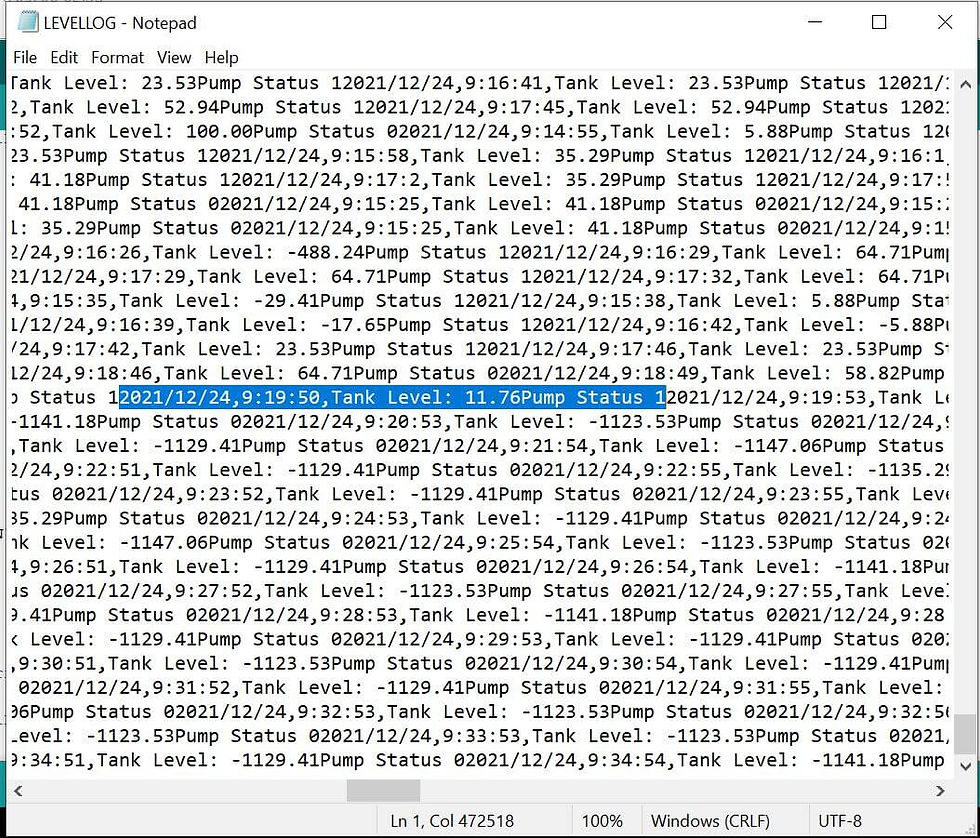
First Power off the arduino nano and remove SD card from module and connect to the PC using SD card reader. The SD card contains LEVELLOG.txt file, the txt file have water level percentage and Pump status with Time stamp.
HTML JS Code
Here to used amChart Gauge for Tank Level and Storage data visualization.
For code
HTML code for Sphere
<!-- Styles -->
<style>
width: 100%;
height: 500px;
}
</style>
<!-- Resources -->
<script src="https://www.amcharts.com/lib/4/core.js"></script>
<script src="https://www.amcharts.com/lib/4/charts.js"></script>
<script src="https://www.amcharts.com/lib/4/plugins/venn.js"></script>
<script src="https://cdn.amcharts.com/lib/4/themes/animated.js"></script>
<!-- Chart code -->
<script>
am4core.ready(function() {
// Themes begin
am4core.useTheme(am4themes_animated);
// Themes end
var capacity = 6000;
var value = 4000;
var circleSize = 0.8;
var component = am4core.create("chartdiv", am4core.Container)
component.width = am4core.percent(100);
component.height = am4core.percent(100);
var chartContainer = component.createChild(am4core.Container);
chartContainer.x = am4core.percent(50)
chartContainer.y = am4core.percent(50)
var circle = chartContainer.createChild(am4core.Circle);
circle.fill = am4core.color("#dadada");
var circleMask = chartContainer.createChild(am4core.Circle);
var waves = chartContainer.createChild(am4core.WavedRectangle);
waves.fill = am4core.color("#34a4eb");
waves.mask = circleMask;
waves.horizontalCenter = "middle";
waves.waveHeight = 10;
waves.waveLength = 30;
waves.y = 500;
circleMask.y = -500;
component.events.on("maxsizechanged", function(){
var smallerSize = Math.min(component.pixelWidth, component.pixelHeight);
var radius = smallerSize * circleSize / 2;
circle.radius = radius;
circleMask.radius = radius;
waves.height = smallerSize;
waves.width = Math.max(component.pixelWidth, component.pixelHeight);
//capacityLabel.y = radius;
var labelRadius = radius + 20
capacityLabel.path = am4core.path.moveTo({x:-labelRadius, y:0}) + am4core.path.arcToPoint({x:labelRadius, y:0}, labelRadius, labelRadius);
capacityLabel.locationOnPath = 0.5;
setValue(value);
})
function setValue(value){
var y = - circle.radius - waves.waveHeight + (1 - value / capacity) * circle.pixelRadius * 2;
waves.animate([{property:"y", to:y}, {property:"waveHeight", to:10, from:15}, {property:"x", from:-50, to:0}], 5000, am4core.ease.elasticOut);
circleMask.animate([{property:"y", to:-y},{property:"x", from:50, to:0}], 5000, am4core.ease.elasticOut);
}
var label = chartContainer.createChild(am4core.Label)
var formattedValue = component.numberFormatter.format(value, "#.#a");
formattedValue = formattedValue.toUpperCase();
label.text = formattedValue + " Litres";
label.fill = am4core.color("#fff");
label.fontSize = 30;
label.horizontalCenter = "middle";
var capacityLabel = chartContainer.createChild(am4core.Label)
var formattedCapacity = component.numberFormatter.format(capacity, "#.#a").toUpperCase();;
capacityLabel.text = "Capacity " + formattedCapacity + " Litres";
capacityLabel.fill = am4core.color("#34a4eb");
capacityLabel.fontSize = 20;
capacityLabel.textAlign = "middle";
capacityLabel.padding(0,0,0,0);
}); // end am4core.ready()
</script>
Android Application
First open Mobile application and select Bluetooth image button, after that select Bluetooth HC-05 device to connect and enter Password as mentioned above (0000 or 1234).
Subscribe and Download code.




Comments