IoT Web Server Based LM35 Temperature Gauge
- Ramesh G

- Mar 3, 2021
- 3 min read
Updated: Jul 2, 2021
In this tutorial we will show how to build ESP8266 and interface LM35 Precision Centigrade Temperature sensor with html canvas gauge display. This project uses ESP8266 NodeMCU device that easily connects to existing WiFi network & creates a Web Server. When any connected device accesses this web server, ESP8266 reads in temperature from LM35 Temperature sensors & sends it to the web browser. In this project temperature range reads trimmed from 0°C to 100°C (Actual -55°C to 150°C).

Components Required
NodeMCU ESP8266 12E Dev Board
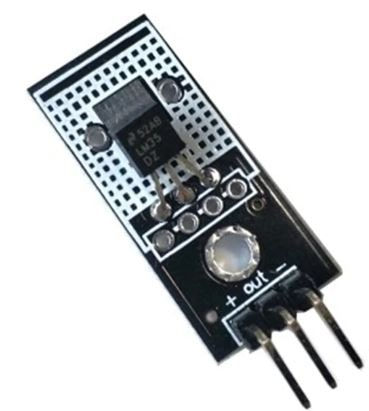
LM35 sensor Module
Circuit Diagram

LM35 Precision Centigrade Temperature Sensor

The LM35 series are precision integrated-circuit temperature devices with an output voltage linearly proportional to the Centigrade temperature. The LM35 device has an advantage over linear temperature sensors calibrated in Kelvin, as the user is not required to subtract a large constant voltage from the output to obtain convenient Centigrade scaling. The LM35 device does not require any external calibration or trimming to provide typical accuracies of ±¼°C at room temperature and ±¾°C over a full −55°C to 150°C temperature range. Lower cost is assured by trimming and calibration at the wafer level. The low-output impedance, linear output, and precise inherent calibration of the LM35 device makes interfacing to readout or control circuitry especially easy. The device is used with single power supplies, or with plus and minus supplies. As the LM35 device draws only 60 μA from the supply, it has very low self-heating of less than 0.1°C in still air. The LM35 device is rated to operate over a −55°C to 150°C temperature range, while the LM35C device is rated for a −40°C to 110°C range (−10° with improved accuracy). The LM35-series devices are available packaged in hermetic TO transistor packages, while the LM35C, LM35CA, and LM35D devices are available in the plastic TO-92 transistor package. The LM35D device is available in an 8-lead surface-mount small-outline package and a plastic TO-220 package.
Features
• Calibrated Directly in Celsius (Centigrade) • Linear + 10-mV/°C Scale Factor • 0.5°C Ensured Accuracy (at 25°C) • Rated for Full −55°C to 150°C Range • Suitable for Remote Applications • Low-Cost Due to Wafer-Level Trimming • Operates From 4 V to 30 V • Less Than 60-μA Current Drain • Low Self-Heating, 0.08°C in Still Air • Non-Linearity Only ±¼°C Typical • Low-Impedance Output, 0.1 Ω for 1-mA Load
Full Range calibration

Temperature Sensor Output Voltage Linearity
LM35 (LM35DZ) proportional to temperature in Celsius (ºC)10mV/ºC
LM335 proportional to temperature in Kelvin (ºK)10mV/ºK
LM34 proportional to temperature in Fahrenheit (ºF)10mV/ºF
In this project LM35DZ is used to measure temperature range from 0ºC to 100ºC.
For example, if the LM35 outputs a voltage of 245 mV, that means we have a temperature value of 24.5ºC.
For example2, if the LM35 outputs a voltage of 1000 mV (1V), that means we have a temperature value of 100ºC.
NodeMCU
NodeMCU ESP8266-12E MCU is a development board with one analogue and many general-purpose input output (GPIO) pins. It has 4MB flash memory, and can operate at a default clock frequency of 80MHz. In this project, analog pin A0 of NodeMCU is used to read analog signal of LM35 Precision Centigrade Temperature Sensor.
Analog Reading
ESP8266 ADC pins have 10-bit resolution by default. These pins read voltage between 0 and 3.3V and then return a value between 0 and 1023.
ESP32 ADC pins have 12-bit resolution by default. These pins read voltage between 0 and 3.3V and then return a value between 0 and 4095
Arduino ADC pins have 10-bit resolution by default. These pins read voltage between 0 and 5V and then return a value between 0 and 1023.
Subscribe and Download code.
Then, upload the code to your NodeMCU board. Make sure you have selected the right board and COM port. Also, make sure you’ve inserted your WiFi Credentials in the code.

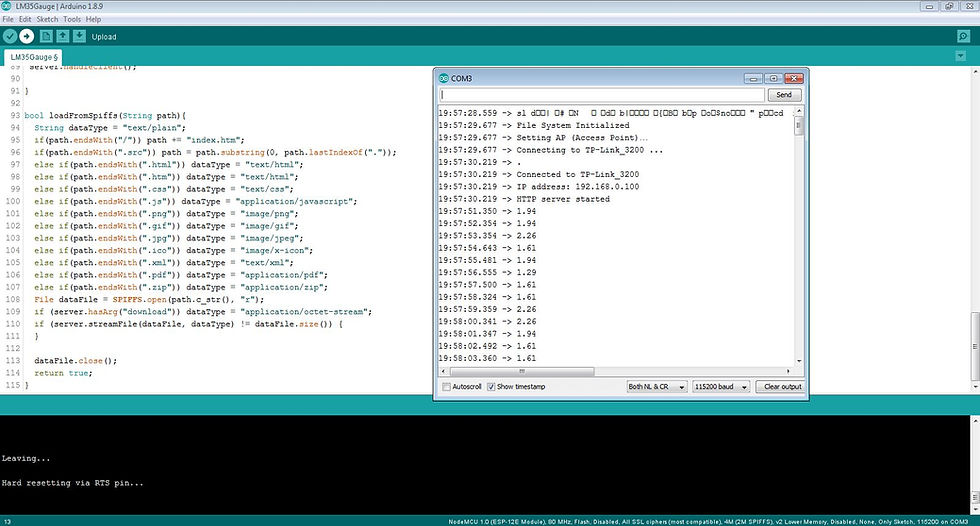
After a successful upload, open the Serial Monitor at a baud rate of 115200. Press the “EN/RST” button on the ESP8266 board. Now it should print its IP address


Comments