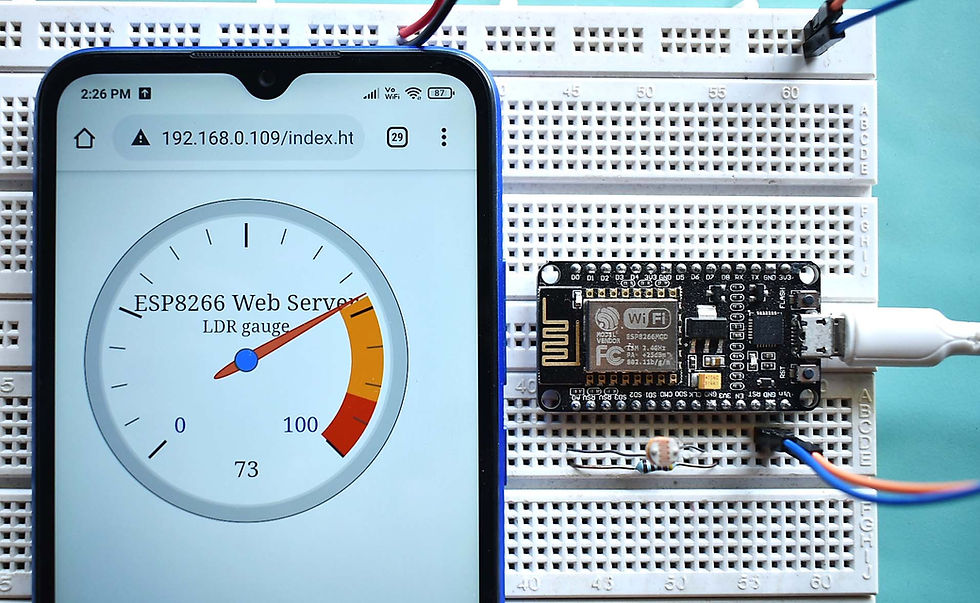
In this tutorial to Learn and uses of JavaScripts, CSS and HTML. Here we are using LDR reading analog value of ADC and display it on HTML web page, which is served by ESP8266 Web server.
And also SPIFFS lets you access the flash chip memory like you would do in a normal filesystem in your computer, but simpler and more limited. You can read, write, close, and delete files. SPIFFS doesn’t support directories, so everything is saved on a flat structure.
Using SPIFFS with the ESP8266 board is specially useful to:
Create configuration files with settings;
Save data permanently;
Create files to save small amounts of data instead of using a microSD card;
Save HTML and CSS files,JavaScripts to build a web server;
Save images, figures and icons;
And much more.

In most of our web server projects, we’ve written the HTML code for the web server as a String directly on the Arduino sketch. With SPIFFS, you can write the HTML and CSS in separated files and save them on the ESP8266 filesystem.
refer previous tutorial about SPIFFS. https://www.dofbot.com/post/esp8266-spiffs-uploader
ESP8266 have only one adc channel. Lets begin to read analog and make something cool.
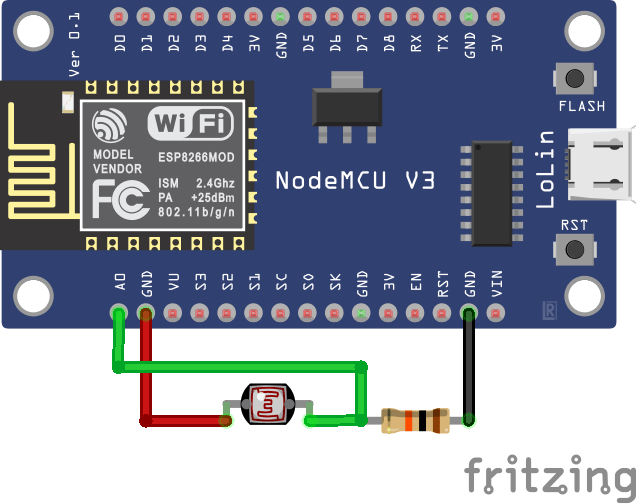
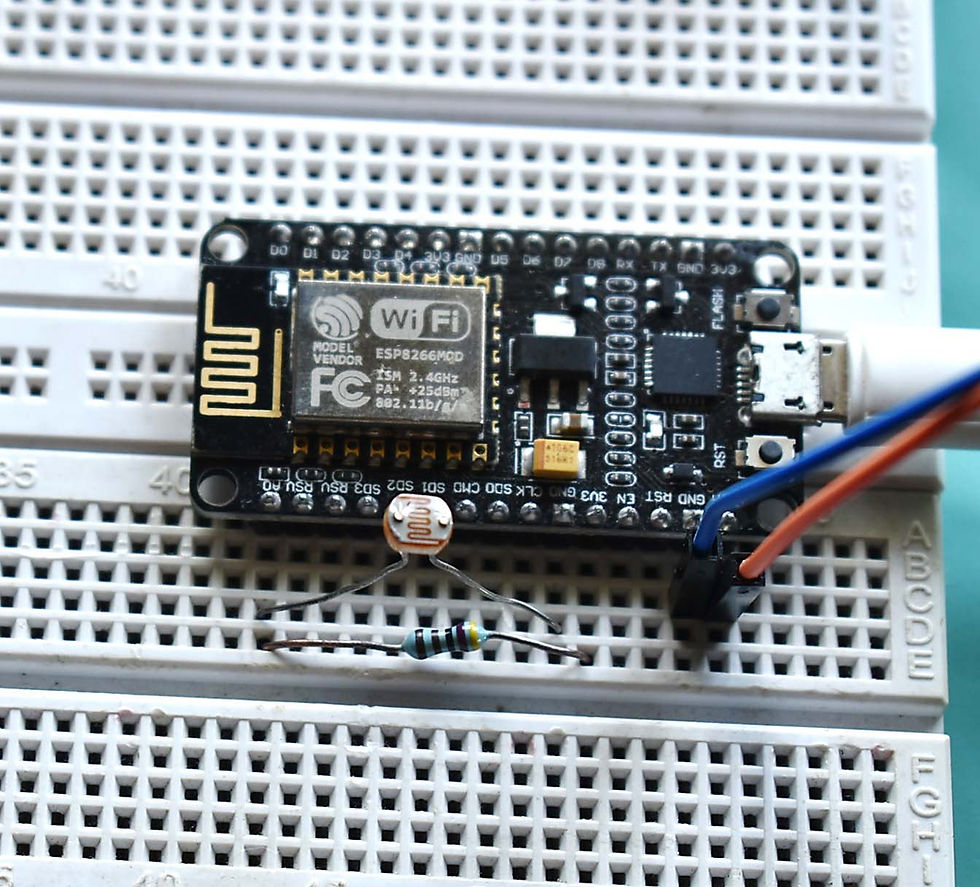
Circuit Diagram

Component Required
Node MCU ESP826612E
LDR
Resister - 10K
NodeMCU
NodeMCU ESP8266-12E MCU is a development board with one analogue and many general-purpose input output (GPIO) pins. It has 4MB flash memory, and can operate at a default clock frequency of 80MHz. In this project, Analog pin A0 of NodeMCU is used to read Voltage in Between LDR and Series Resister.
LDR
Light dependent resistors, LDRs, or a photoresistor is a passive component that decreases resistance with respect to receiving luminosity on the component's sensitive surface. The resistance of a photoresistor decreases with increase in incident light intensity; in other words, it exhibits photoconductivity.

After installing the library, go to your Arduino IDE. Make sure you have the Nodemcu 1.0 ESP-12E board selected, and then, Copy and Paste code in Arduino IDE.
To do this create a folder named as “data” in your sketch folder i.e. where you saved your above .ino file. Then Download and unzip these files ESP8266-analog-gauge-data.
Folder structure is your .ino file with data folder. In data folder you have these files index.html, style.css, jQuery.min.js, d3-gauge.js.
Subscribe and Download code.
Arduino code
#include <ESP8266WiFi.h>
#include <ESP8266WebServer.h>
#include <FS.h> //Include File System Headers
const char* htmlfile = "/index.html";
const char* ssid = "TP-Link_3200"; // your SSID
const char* password = "9500112137"; //Your WIFi Password
ESP8266WebServer server(80);
void handleADC(){
int a = analogRead(A0);
a = map(a,0,1023,0,100);
String adc = String(a);
Serial.println(adc);
server.send(200, "text/plane",adc);
}
void handleRoot(){
server.sendHeader("Location", "/index.html",true); //Redirect to our html web page
server.send(302, "text/plane","");
}
void handleWebRequests(){
if(loadFromSpiffs(server.uri())) return;
String message = "File Not Detected\n\n";
message += "URI: ";
message += server.uri();
message += "\nMethod: ";
message += (server.method() == HTTP_GET)?"GET":"POST";
message += "\nArguments: ";
message += server.args();
message += "\n";
for (uint8_t i=0; i<server.args(); i++){
message += " NAME:"+server.argName(i) + "\n VALUE:" + server.arg(i) + "\n";
}
server.send(404, "text/plain", message);
Serial.println(message);
}
void setup() {
delay(1000);
Serial.begin(115200);
Serial.println();
//Initialize File System
SPIFFS.begin();
Serial.println("File System Initialized");
//Connect to wifi Network
WiFi.begin(ssid, password); //Connect to your WiFi router
Serial.println("");
// Wait for connection
while (WiFi.status() != WL_CONNECTED) {
delay(500);
Serial.print(".");
}
//If connection successful show IP address in serial monitor
Serial.println("");
Serial.print("Connected to ");
Serial.println(ssid);
Serial.print("IP address: ");
Serial.println(WiFi.localIP()); //IP address assigned to your ESP
//Initialize Webserver
server.on("/",handleRoot);
server.on("/getADC",handleADC); //Reads ADC function is called from out index.html
server.onNotFound(handleWebRequests); //Set setver all paths are not found so we can handle as per URI
server.begin();
}
void loop() {
server.handleClient();
}
bool loadFromSpiffs(String path){
String dataType = "text/plain";
if(path.endsWith("/")) path += "index.htm";
if(path.endsWith(".src")) path = path.substring(0, path.lastIndexOf("."));
else if(path.endsWith(".html")) dataType = "text/html";
else if(path.endsWith(".htm")) dataType = "text/html";
else if(path.endsWith(".css")) dataType = "text/css";
else if(path.endsWith(".js")) dataType = "application/javascript";
else if(path.endsWith(".png")) dataType = "image/png";
else if(path.endsWith(".gif")) dataType = "image/gif";
else if(path.endsWith(".jpg")) dataType = "image/jpeg";
else if(path.endsWith(".ico")) dataType = "image/x-icon";
else if(path.endsWith(".xml")) dataType = "text/xml";
else if(path.endsWith(".pdf")) dataType = "application/pdf";
else if(path.endsWith(".zip")) dataType = "application/zip";
File dataFile = SPIFFS.open(path.c_str(), "r");
if (server.hasArg("download")) dataType = "application/octet-stream";
if (server.streamFile(dataFile, dataType) != dataFile.size()) {
}
dataFile.close();
return true;
}

Then, upload the code to your NodeMCU board. Make sure you have selected the right board and COM port. Also, make sure you’ve inserted your WiFi Credentials in the code.
After a successful upload, open the Serial Monitor at a baud rate of 115200. Press the “EN/RST” button on the ESP8266 board. Now it should print its IP address.
Open Browser and type ip address in the address bar and see the below result.


Comments