Internet Weather Station
- Ramesh G
- May 1, 2022
- 4 min read
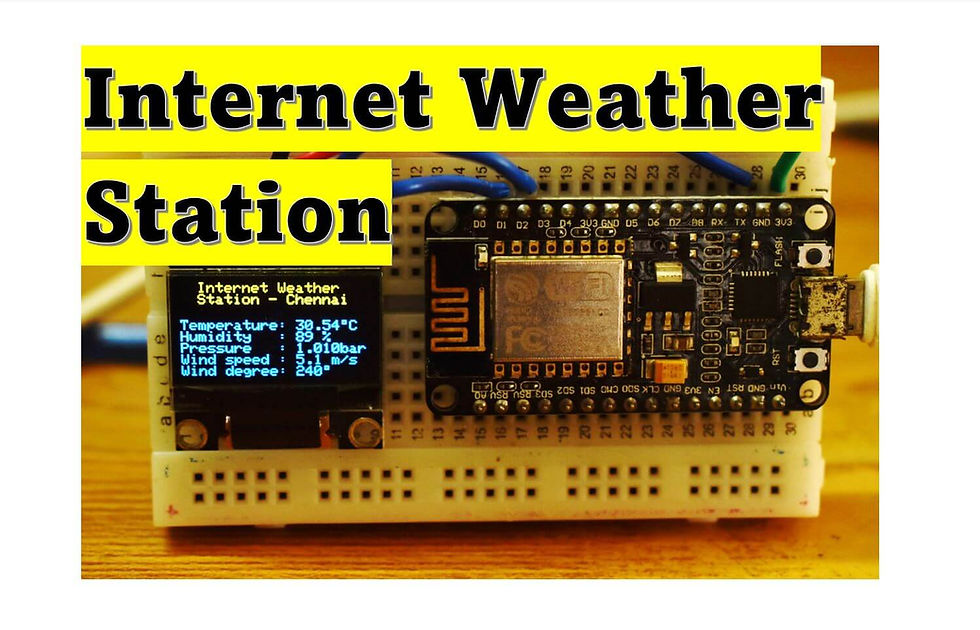
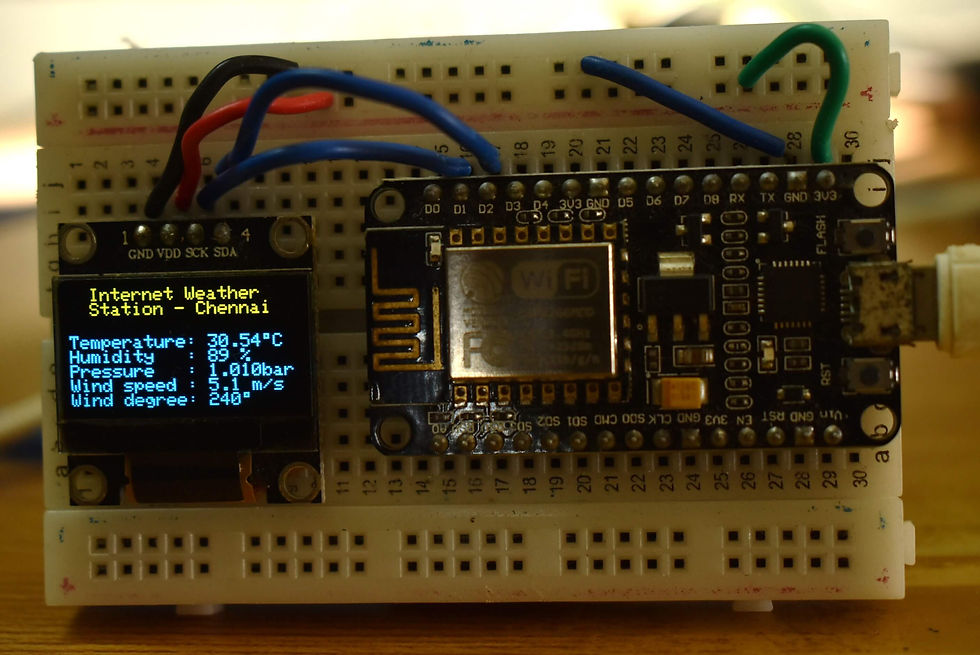
Here to learn how to make an IOT based internet weather station with OLED.
The ESP8266 can access the internet and gets weather data from

www.openweathermap.org that provide Free/Paid weather information for many cities over the world. In this project to show how to get weather data from the internet and print it on Arduino IDE serial monitor and OLED display.
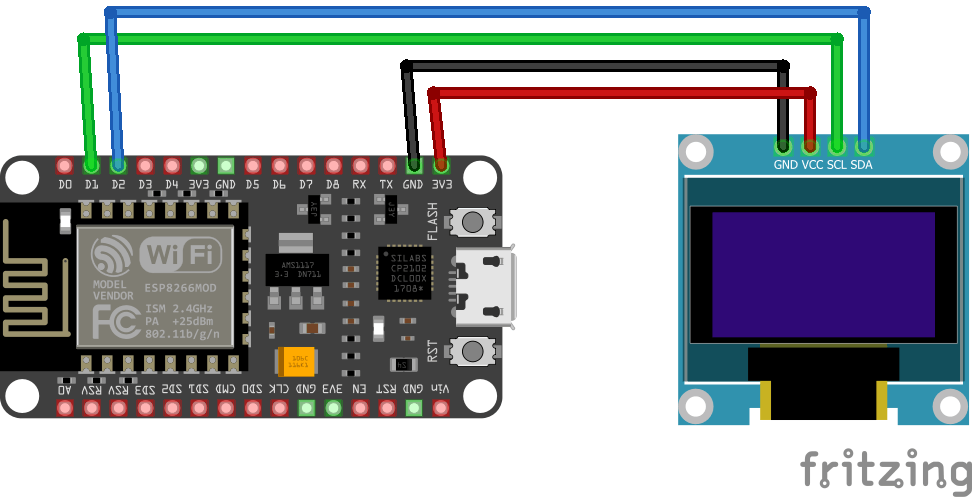
Circuit Diagram
Components Required
0.96 OLED 4wire Module - 1no
Node MCU ESP8266 12E Dev Module- 1 no
Open weather map
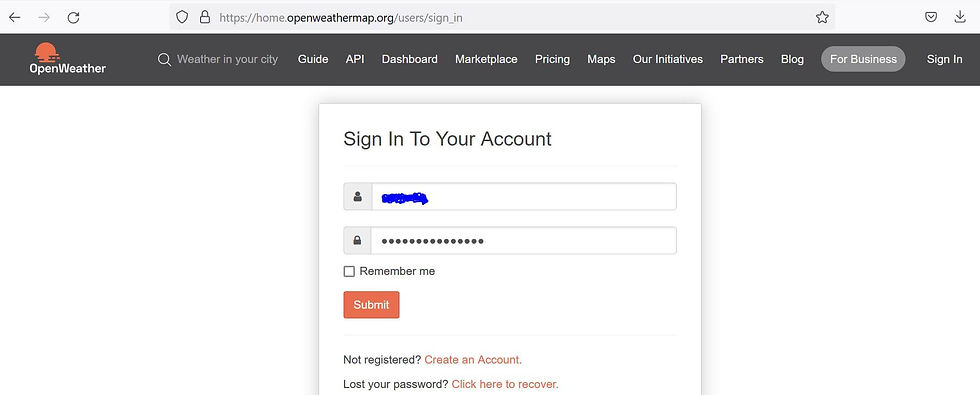
Internet weather station To get weather data, first we’ve to sign up for a free account in order to get an API key which is important in this project.
Feature
Access current weather data for any location including over 200,000 cities
Current weather is frequently updated based on global models and data from more than 40,000 weather stations
Data is available in JSON, XML, or HTML format
Available for Free and all other paid accounts
Once you sign in to your account (of course after the free registration), you’ll be directed to member area, go to API keys and you’ll find your API key as shown in the following image:
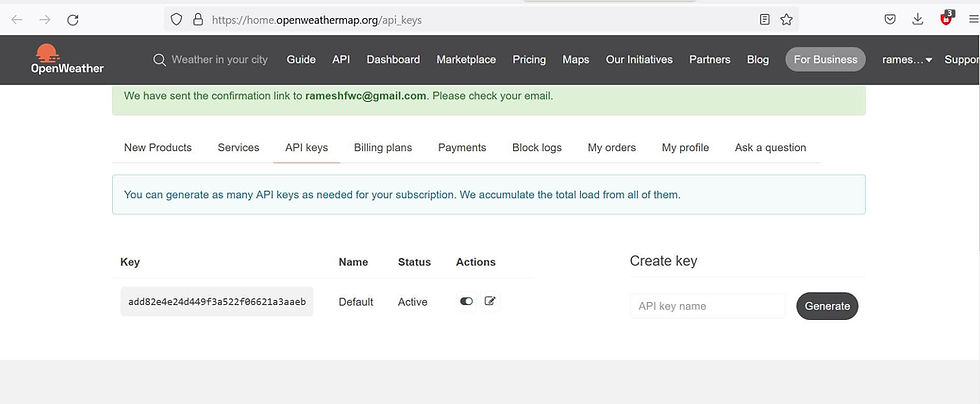
Replace CITY by with the city you want weather data for, COUNTRY_CODE with the country code for that city (for example uk for the United Kingdom, us for the USA …) and YOUR_API_KEY with your API key which is shown above and replace API key in the arduino code.

For example the weather in Chennai, India URL and API key.
String Location = "Chennai,India"; // your city,country
String API_Key = "xxxxxxxxxxxxxxxxxxxxx";//your api (openweather)
As mentioned above the openweathermap.org website provides weather data in JSON, XML, or HTML format. In this project we’ll use the JSON format which can be parsed using an Arduino library called ArduinoJSON.
For more detail with JSON format: ArduinoJson Assistant
With a built-in library named: ESP8266HTTPClient we can read http pages, accessing a page is simple with this library, just by putting its URL as shown below where I placed the URL of Chennai city weather:
http.begin("http://api.openweathermap.org/data/2.5/weather?q=" + Location + "&APPID=" + API_Key); // !!
After that we’ve to read and save the whole JSON page as a string:
String payload = http.getString(); //Get the request response payload
And finally the ArduinoJSON library does its job and decodes the JSON string:
JsonObject& root = jsonBuffer.parseObject(payload);
The openweathermap.org website provides temperature in °K (degree Kelvin) and to convert the °K into °C (degree Celsius) we’ve to substruct 273.15 from it. For that I used the following line:
floattemp=(float)(root["main"]["temp"])-273.15;// get temperature
Also, it gives the pressure in hPa (Hectopascal) with 1 hPa = 100 Pascal = 1/1000 bar:
float pressure = (float)(root["main"]["pressure"]) / 1000; // get pressure
Humidity is in %, wind speed in m/s (meters per second) and wind degree in degrees (°).
Installing Library
To install the library navigate to the Sketch > Include Library > Manage Libraries… Wait for Library Manager to download libraries index and update list of installed libraries.
Download Adafruit_SSD1306_Library , we need to use this library for SSD1306 OLED display
Download Adafruit_GFX_Library , we need to use this library for Graphics
Download ArduinoJson Library , we need to use this library for JSON decoding
After installing the required libraries, copy the following code to your Arduino IDE.
arduino code
#include <SPI.h>
#include <ESP8266WiFi.h>
#include <ESP8266HTTPClient.h> // http web access library
#include <ArduinoJson.h> // JSON decoding library
// Libraries for SSD1306 OLED display
#include <Wire.h> // include wire library (for I2C devices such as the SSD1306 display)
#include <Adafruit_GFX.h> // include Adafruit graphics library
#include <Adafruit_SSD1306.h> // include Adafruit SSD1306 OLED display driver
#define SCREEN_WIDTH 128 // OLED display width, in pixels
#define SCREEN_HEIGHT 64 // OLED display height, in pixels
#define OLED_RESET -1 // define SSD1306 OLED reset at ESP8266 GPIO5 (NodeMCU D1)
#define SCREEN_ADDRESS 0x3C ///< See datasheet for Address; 0x3D or 0x3C for 128x64
Adafruit_SSD1306 display(SCREEN_WIDTH, SCREEN_HEIGHT, &Wire, OLED_RESET);
// set Wi-Fi SSID and password
const char *ssid = "TP-Link_3200"; //your SSID
const char *password = "95001121379884265554";//your password
// set location and API key
String Location = "Chennai,India"; // your city,country
String API_Key = "add82e4e24d449f3a522f06621a3aaeb";//your api (openweather)
void setup(void)
{
Serial.begin(9600);
delay(1000);
// Wire.begin(4, 0); // set I2C pins [SDA = GPIO4 (D2), SCL = GPIO0 (D3)], default clock is 100kHz
// SSD1306_SWITCHCAPVCC = generate display voltage from 3.3V internally
if(!display.begin(SSD1306_SWITCHCAPVCC, SCREEN_ADDRESS)) {
Serial.println(F("SSD1306 allocation failed"));
for(;;); // Don't proceed, loop forever
}
// Wire.setClock(400000L); // set I2C clock to 400kHz
display.clearDisplay(); // clear the display buffer
display.setTextColor(WHITE, BLACK);
display.setTextSize(1);
display.setCursor(0, 0);
display.println(" Internet Weather");
display.print(" Station - Chennai");
display.display();
WiFi.begin(ssid, password);
Serial.print("Connecting.");
display.setCursor(0, 24);
display.println("Connecting...");
display.display();
while ( WiFi.status() != WL_CONNECTED )
{
delay(500);
Serial.print(".");
}
Serial.println("connected");
display.print("connected");
display.display();
delay(1000);
}
void loop()
{
if (WiFi.status() == WL_CONNECTED) //Check WiFi connection status
{
HTTPClient http; //Declare an object of class HTTPClient
// specify request destination
http.begin("http://api.openweathermap.org/data/2.5/weather?q=" + Location + "&APPID=" + API_Key); // !!
int httpCode = http.GET(); // send the request
if (httpCode > 0) // check the returning code
{
String payload = http.getString(); //Get the request response payload
DynamicJsonBuffer jsonBuffer(512);
// Parse JSON object
JsonObject& root = jsonBuffer.parseObject(payload);
if (!root.success()) {
Serial.println(F("Parsing failed!"));
return;
}
float temp = (float)(root["main"]["temp"]) - 273.15; // get temperature in °C
int humidity = root["main"]["humidity"]; // get humidity in %
float pressure = (float)(root["main"]["pressure"]) / 1000; // get pressure in bar
float wind_speed = root["wind"]["speed"]; // get wind speed in m/s
int wind_degree = root["wind"]["deg"]; // get wind degree in °
// print data
Serial.printf("Temperature = %.2f°C\r\n", temp);
Serial.printf("Humidity = %d %%\r\n", humidity);
Serial.printf("Pressure = %.3f bar\r\n", pressure);
Serial.printf("Wind speed = %.1f m/s\r\n", wind_speed);
Serial.printf("Wind degree = %d°\r\n\r\n", wind_degree);
display.setCursor(0, 24);
display.printf("Temperature: %5.2f C\r\n", temp);
display.printf("Humidity : %d %%\r\n", humidity);
display.printf("Pressure : %.3fbar\r\n", pressure);
display.printf("Wind speed : %.1f m/s\r\n", wind_speed);
display.printf("Wind degree: %d", wind_degree);
display.drawRect(109, 24, 3, 3, WHITE); // put degree symbol ( ° )
display.drawRect(97, 56, 3, 3, WHITE);
display.display();
}
http.end(); //Close connection
}
delay(60000); // wait 1 minute
}
// End of code.
After a successful upload, open the Serial Monitor at a baud rate of 9600. Press the “EN/RST” button on the ESP8266 board. Now it should print its weather data.

Demo


There is no actual code to download, all download links are only for ArduinoJson-5.13.2.zip